Er bruisen altijd honderden ideeën door mijn hoofd, hebben jullie dat ook?
Daarom ben ik zo blij met Pinterest, voor het geval ik een leuk ideetje vergeet, of inspiratie nodig heb haha. Ik wilde een leuk brievenbuscadeautje maken, en ik werd geïnspireerd door een blog van Heart Handmade UK en dus eigenlijk Love Mae: lavendel theezakjes. In plaats van papier maakte ik ze van stof, zo kun je ze gebruiken in je linnenkast of als je heerlijk wilt ontspannen in bad.
Hundreds of ideas are buzzing through my head constantly, and you probably know what I'm talking about haha.
That's why I'm so happy with Pinterest, in case I might forget an idea, or if I need inspiration. I wanted to make a cute mailbox present, and this time I was inspired by blogs from Heart Handmade UK and Love Mae: lavender tea bags.
Instead of paper I made them out of fabric, so they can be used in your linnen closet or for a relaxing bath.
Hieronder zie je een tekening van hoe je ze maakt, en de foto's maken het nog wat duidelijker.
Here's a drawing about how to make them, and the pictures will make things clear if you don't completely understand what I'm on about.
Knip rechthoeken uit stof, ongeveer 9 bij
Cut rectangles out of fabric, appr. 3,5 by 6 or 4,5 by 7 inches. If you want to make them bigger, keep these proportions.

Gebruik ongebleekt vloeipapier (of een koffiefilter) als je er echte theezakjes van wilt maken.
Als je de lavendel bijvoorbeeld in een thee-ei gaat gebruiken kun je ook voor de sier mooi papier met een patroontje gebruiken. Vouw het papier in drieën met een kleine overlap en doe een beetje papierlijm op het gestreepte gedeelte in de tekening.
Als je stof gebruikt zoals ik, vouw de stof dan in de lengte door midden en naai de zijkanten vast (kan natuurlijk ook met de hand. Ik deed dit met een zigzagsteek voor
extra sterkte maar dit is niet per se nodig).
Use unbleached tissue paper (or coffee filter paper) if you want to make bags for proper lavender tea.
If you're going to use the lavender in a tea infuser you can also use some pretty pattern paper for decoration, and glue the edges with paper glue. Fold the paper in three with a small overlap, and glue the striped part in the drawing.
When you're going to make them out of fabric like me, fold the fabric in half lenghtwise and sew the edges together (of course this can be done by hand too. I used a zigzag stitch, but this is not really necessary).
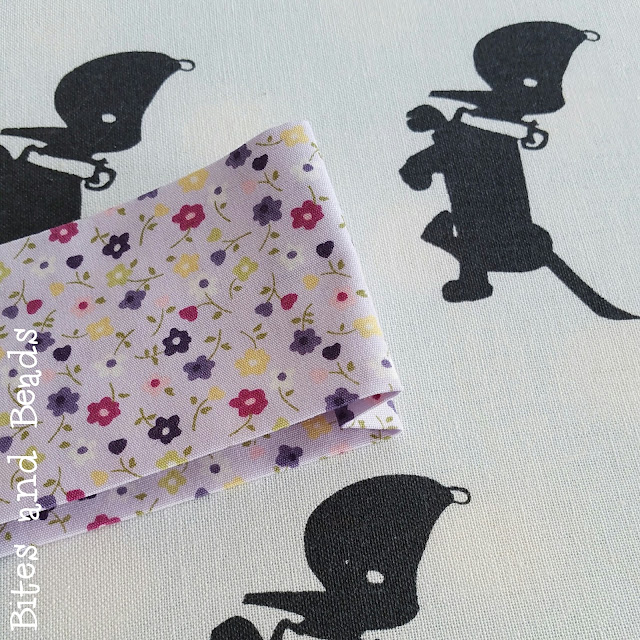
Draai de stof met de goede kant naar buiten en de naad in het midden, en strijk een goede vouw in de zijkanten.
Turn the fabric with the pretty side out and the seam in the middle, and use a hot iron to make creases on the sides.
Vouw de stof in tweeën met de naad naar buiten en strijk hier ook een goede vouw in.
Fold the fabric in two with the seam outside and iron another crease.
Vouw de stof in een 'W'-vorm en strijk opnieuw.
Fold the fabric like a 'W' and iron again.
Vouw de zijkanten naar binnen en strijk ook deze.
Fold the sides inward, and iron these as well.
Als laatste vouw je de opening naar binnen en strijk je ook deze vouw.
After that you fold the opening inward and iron this crease too.
Vul beide kanten met gedroogde lavendel. Het leukst is natuurlijk uit eigen tuin, maar natuurwinkels verkopen het ook.
Fill both sides with dried lavender. If you don't have any lavender in your garden, or it's not the right season, you could find it in wholefood stores.
Ik ben een grote fan van de distress inkt van Ranger, en ik maakte hier de labeltjes mee. Als je dit niet hebt kun je ze maken van leuk papier.
I'm a big fan of the distress inks from Ranger, and I used it for the labels. If you don't have these inks, you can use some pretty paper instead
Knip een touwtje van ongeveer 10 cm en maak aan beide kanten een knoopje.
Niet het zakje aan de ene kant en het labeltje aan de andere kant, gebruik een stevige ondergrond om goed kracht te kunnen zetten.
Cut a string of appr. 10 cm or 4 inches and tie a little knot on both sides.
Staple the bag on one side and the label on the other, use a sturdy base so you can apply pressure when doing this.
En klaar zijn je cadeautjes voor een verjaardag, voor Moederdag, als bedankje, of lekker voor jezelf!
Ook heerlijk als je ze vult met citroenverbena, bergamot, kamille, tijm of andere heerlijk geurende kruiden...
And there you are, lovely scented presents for a birthday, for Mother's day, as a thank you present or to treat yourself!
Fill them with lemon verbena, chamomile, bergamot, thyme or other lovely smelling herbs...
X Maartje


Wat leuk! Kwam dit vandaag tegen! Vraagje: hoe heb je zo mooi de tekst " lavendel" erop gekregen?
BeantwoordenVerwijderenSorry voor mijn late antwoord! Je bericht is in mijn spam-box terecht gekomen, gelukkig zag ik het toevallig. Ik heb de tekst met de hand geschreven, met mijn favoriete pen PermaBall van Pilot, dat is een soort fijnschrijver met een balletje erin. Ik hoop dat ik je zo geholpen heb! Fijne dag, groetjes Maartje
Verwijderen