Een mooie volle pompon maken lukt bijna niet met kartonnetjes, althans, mij niet. Maar daar hebben ze wat op gevonden!
De pomponmaker!
Ik heb die van Clover, maar er zijn meer merken die ze maken.
To make a beautiful fluffly pompon is very hard to do, for me at least. But they found a solution for this!
The pomponmaker!
I've got a Clover one, but there are more brands who make them.

Je kunt met een enkele draad wikkelen, maar met 2 tegelijk is efficiënter natuurlijk. Helemaal als je dunne wol gebruikt. Dus trek het uiteinde uit het midden van de bol (soms is het wel even zoeken, of trek je er een grote prop uit, maar dat geeft niet).
Zo heb je twee uiteindes waar je mee kunt wikkelen. Of je gebruikt 2 bollen wol tegelijk, dat kan natuurlijk ook.
You could use a single thread to wrap around, but two at the same time is a lot more efficient of course. Especially when you have thin yarn. So pull out the thread from the centre of the ball (sometimes it's a bit hard to find, and you pull out a big lump, but that's okay).
This way you have 2 ends to work with. But obviously you can use two balls at the same time too.

Maak je een lekker drankje voor jezelf, een kopje thee of koffie, of waar je dan ook maar zin in hebt.
Prepare yourself with a nice coffee, tea or whatever else you feel like.

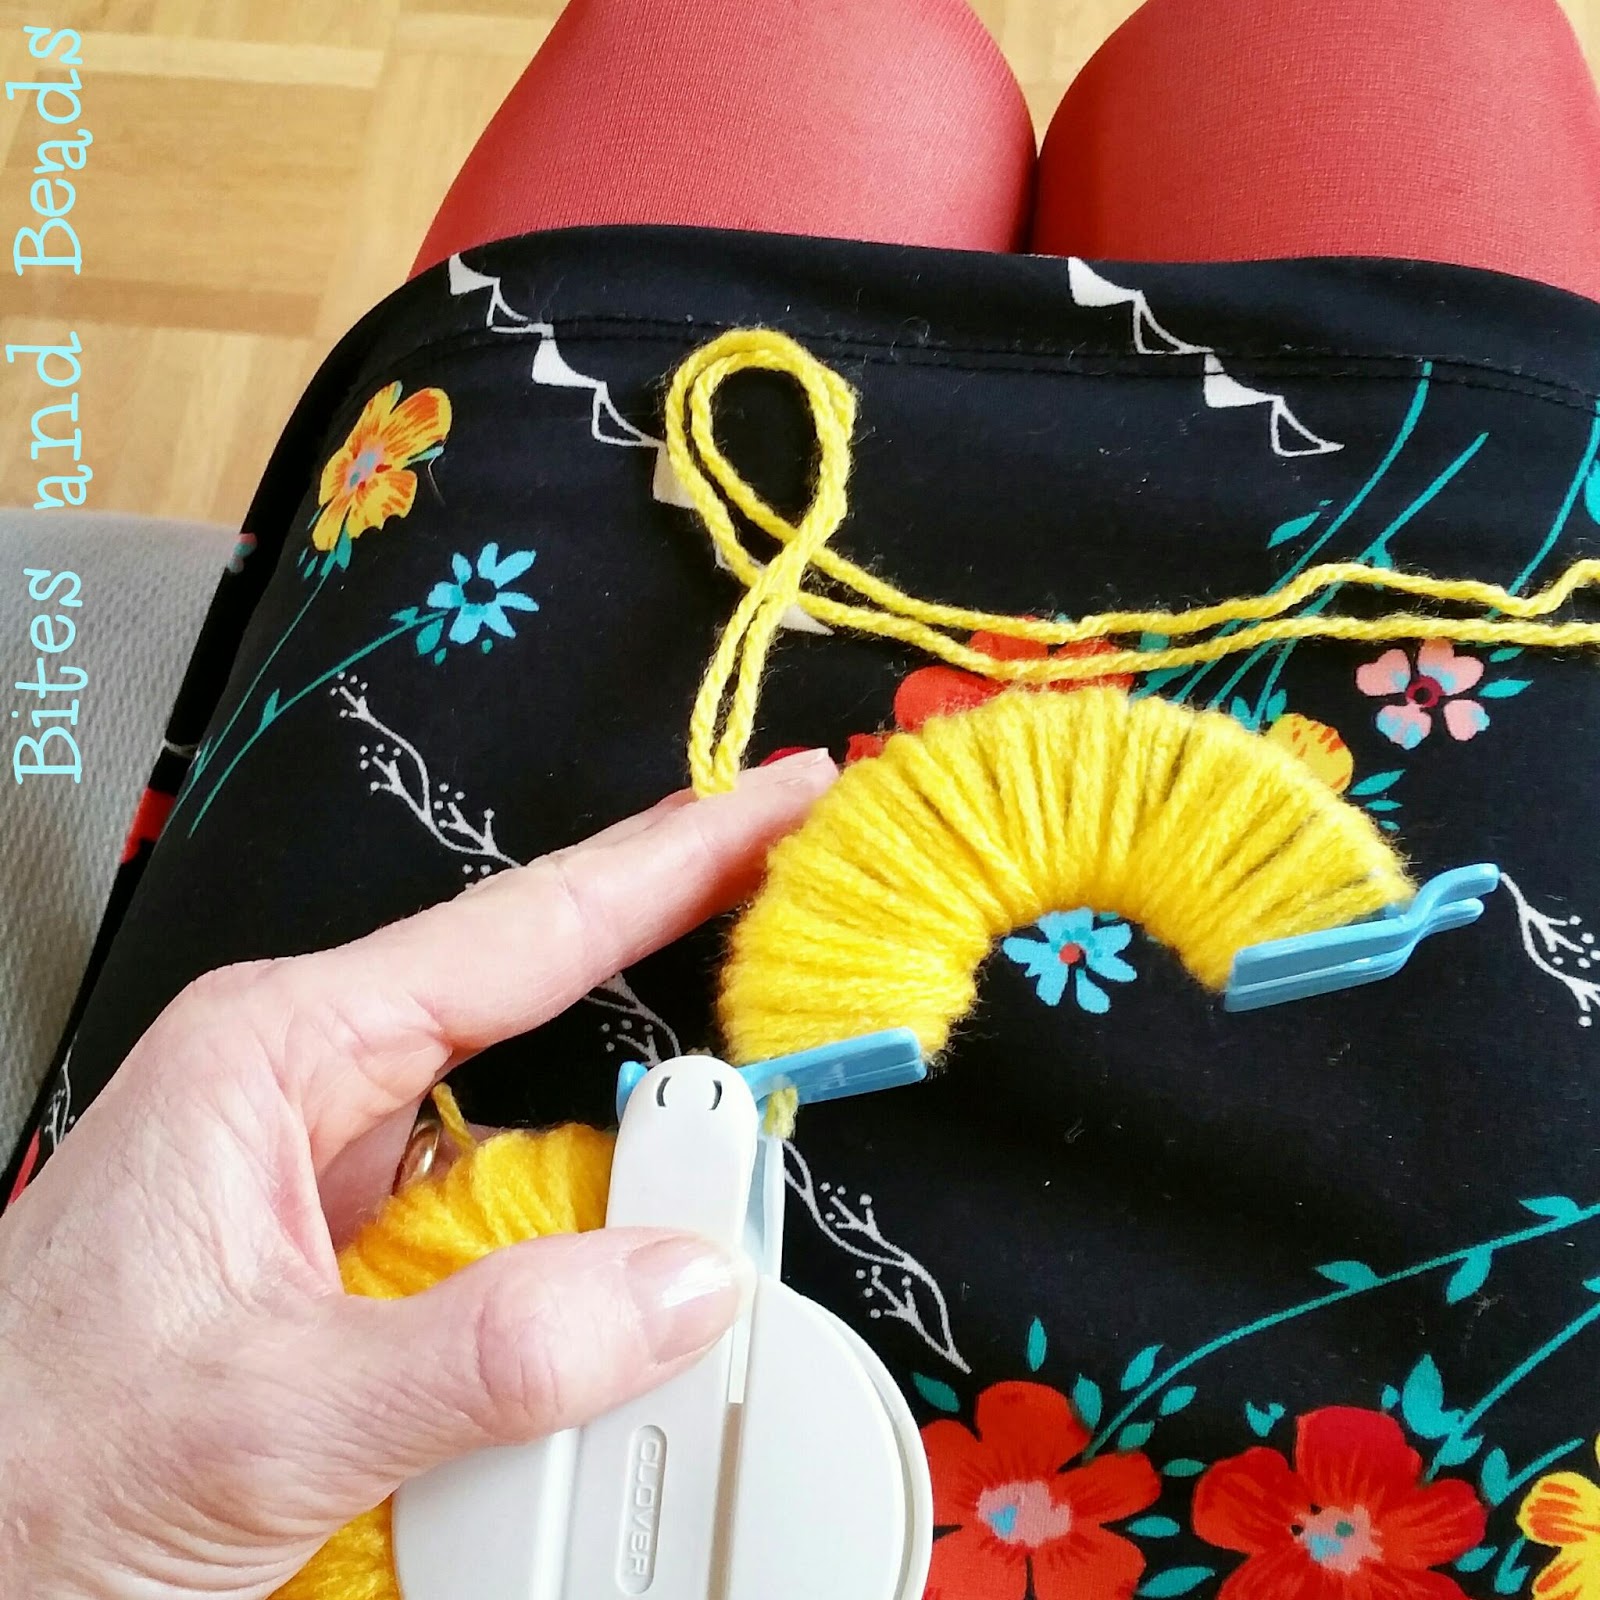
Open de pomponmaker aan 1 kant en houd met 2 vingers de draden op hun plaats. Met je andere hand wikkel je de draad.
Open the pomponmaker on 1 side and keep the thread in place with 2 fingers. Wrap the thread around with your other hand.

Verdeel de draad gelijkmatig over een helft van de pomponmaker, steeds van links naar rechts, rechts naar links en weer terug.
Wrap it around evenly about a half of the pomponmaker, from left to right, right to left and back again.
Blijf hiermee doorgaan tot het een beetje uitstulpt en je de helft nog net kunt dichtklappen, zo wordt je pompon nog voller.
Continue until you almost cannot fold it in anymore, so your pompon becomes even fluffier.

En hetzelfde doe je natuurlijk met de andere helft.
And of course you do this with the other half as well.

Dan neem je een loeischerpe schaar en knip je tussen de twee 'armpjes' door, zorg ervoor dat beide helften goed ingeklapt blijven.
Cut in between the two 'arms' with really sharp scissors. Make sure both halves stay in place.


Als je beide helften helemaal doorgeknipt hebt, neem je een lang stuk (dubbel) draad en knoop je deze zo strak mogelijk door het midden van armpjes heen vast. Je kunt eerst een enkele knoop doen, dan nog een keer door de armpjes heen halen en dan een dubbele knoop maken. Dit gaat soms wat makkelijker.
When you've cut both halves, take a long piece of (double) thread and tie it around as tightly as possible in between the arms. Sometimes it's easier to make a single knot first, then wrap it around once more and make a double knot.

Vervolgens trek je beide helften uit elkaar.
Pull the two halves apart.


Gebruik de lange uiteindes van de knoopdraad om de pompon even lekker te schudden zodat hij zijn vorm krijgt.
Use the long ends to shake the pompon up, so it gets it's shape.

Nu ziet hij er nog niet uit, maar met de schaar kun je hem een mooie knipbeurt geven en dan is dit het resultaat!
Niet vergeten om er een oude krant onder te leggen, scheelt een hoop stofzuigen haha!)
Now it still looks all weird, but with the scissors you can turn it into this beautiful fluffy round ball!
(And don't forget to put some old newspapers underneath, so there's no need for vacuuming afterwards haha!)

De lange uiteindes van de knoopdraad kun je gebruiken om hem te bevestigen op bijvoorbeeld die leuke #heymuts van Wimke Tolsma...
You can attach the pompon to for example the #heymuts designed by Wimke Tolsma with the long ends of the thread you used for the knot...

Have fun!! Groetjes, Maartje
Reacties
Een reactie posten