
Wij hebben in de tuin een aantal fruitbomen, waaronder een Poire Williams. Dat is een oud Frans perenras met heerlijke sappige peren, die snel rijpen en dus meestal niet in winkels te krijgen zijn. Misschien ken je deze peren ook wel van de Eau de Vie, dan laten ze een peer in een fles groeien, en vullen hem daarna aan met alcohol.
Onze peren waren extreem vroeg rijp dit jaar, ook al waren ze nog erg klein, maar dat zal zijn omdat het nog maar een jonge boom is.
We hebben er een paar zo op gegeten (lees: eerst gewassen, geschild, het klokhuis en alle toebehoren zoals wormpjes, hun gangetjes en rare plekjes helemaal weggesneden, getver haha!), en van de rest maakten we jam.
In our garden we have a couple of fruit trees, and among them is a Williams Pear. It's an old French variety with delicious juicy pears which ripen quickly, and therefore they are not really available in shops. It could be you know them from a French liquor, Eau de Vie. They let a pear grow inside a bottle and then fill it up with alcohol.
Our pears were ripening extremely early this year, although they were still tiny, but that could be because the tree is still young.
We ate a couple straight from the tree (read: washed, peeled and core, worms, their holes and any funky bits removed, grose haha!), and we made jam with the rest.
Ik vond een recept op de website van Landleven, als je deze overheerlijke jam (echt de allerlekkerste die ik ooit gegeten heb!) ook wilt maken, klik dan hier voor het recept:
Daar hoef je natuurlijk geen eigen boom voor te hebben, peren van de (super-)markt zijn ook prima.
Soort maakt ook niet echt uit, wel geldt hoe rijper hoe beter!
Het enige dat ik nog extra toegevoegd heb is de sinaasappelschil. Oja, en ik liet het vanillestokje meekoken.
I found the recipe on the website of Landleven, it is in Dutch and I altered it a bit, so here's the description of what I did.
You need :
1,5 kg pears for eating
(Of course you don't need your own tree, pears from the (super-)market will do nicely. It probably doesn't really matter what variety they are, but the riper and juicier the better!)
1 vanilla pod
1 orange peel and it's juice
500 gr semi sweet jam sugar
special jam jars or recycled glass jars
Remove the peel, core and any nasty bits from the pears and cut them into small cubes. I used a mandolin for potato fries, just as easy.
Fill a pan with water and bring it to a boil. Add the jars and their lids and cook them for a while to sterilize them.
In the meantime you put the pear cubes in a pan with a thick bottom and add the other ingredients.
Use the backside of a knife or a spoon to get all the scrumptious seeds out of the vanilla pod, and make sure they end up in your jam.
Bring to a boil for at least a minute, I let it cook for about 3 to 4 minutes. Don't forget to stir once in a while.
Remove the vanilla pod and fill the clean, warm jars.
Put the lids on the jars and turn them upside down. Leave them like this while cooling down for at least 10 minutes or so. I use oven gloves all the time because everything is way too hot to handle!
You can find the original recipe here:
Ook al moesten we best veel wegsnijden hielden we toch genoeg over voor 8 potten jam.
Superleuk als cadeautje natuurlijk (als je er tenminste afstand van kunt doen...!), en helemaal met een zelfgehaakt hoesje, met een peer- en sinaasappelapplicatie!
Ik heb potjes hergebruikt, dus had verschillende grootte deksels.
Het patroon is in principe hetzelfde, je moet alleen wat extra meerderen voor een grote deksel.
De afkortingen die ik gebruik zijn:
l: losse
hv: halve vaste
v: vaste
vlgd st: volgende steek
If you have enough jars to fill your needs (never! hahaha!), you might want to give away some. It's a lovely gift, especially with a matching crocheted cover, with a pear- and orange appliqué!
I recycled the jars, so the lids were all different sizes.
The pattern starts the same for all of them, all you need to do is add some extra rounds for a larger lid.
The terms I use are American and these are the abbreviations:
ch: chain 1
sl.st.: slip stitch
sc: single crochet

- Haak 5 v in een magische ring en sluit af met een hv.
- Haak 1 l, dan 2 v in elke v (10), sluit af met een hv.
- Haak 1 l, dan vijf keer (1 v, 2 v in de vlgd st) (15), sluit af met een hv.
- Haak 1 l, dan vijf keer (1 v, 1 v, 2 v in de vlgd st) (20), sluit af met een hv.
- Meerder per ronde door 1 v in een reeks extra, zo kom je uit op 25, 30, 35, etc. steken per toer.
- Je hoesje is groot genoeg wanneer je iets overlap hebt.
- Crochet 5 sc in a magic ring, close with a sl.st.
- Ch 1, then 2 sc in every st (10), close with a sl.st.
- Ch 1, then five times (1 sc, 2 sc in the next st), (makes 15), close with a sl.st.
- Ch 1, then five times (1 sc, 1 sc, 2 sc in the next st), (makes 20), close with a sl.st.
- Ch 1, then five times (1 sc, 1 sc, 2 sc in the next st), (makes 20), close with a sl.st.
- Add extra rounds by increasing with an extra sc in every set (so what's in between brackets). You end up with 25, 30, 35, etc. st per round.
- Your cover is big enough when it overlaps the lid a little.

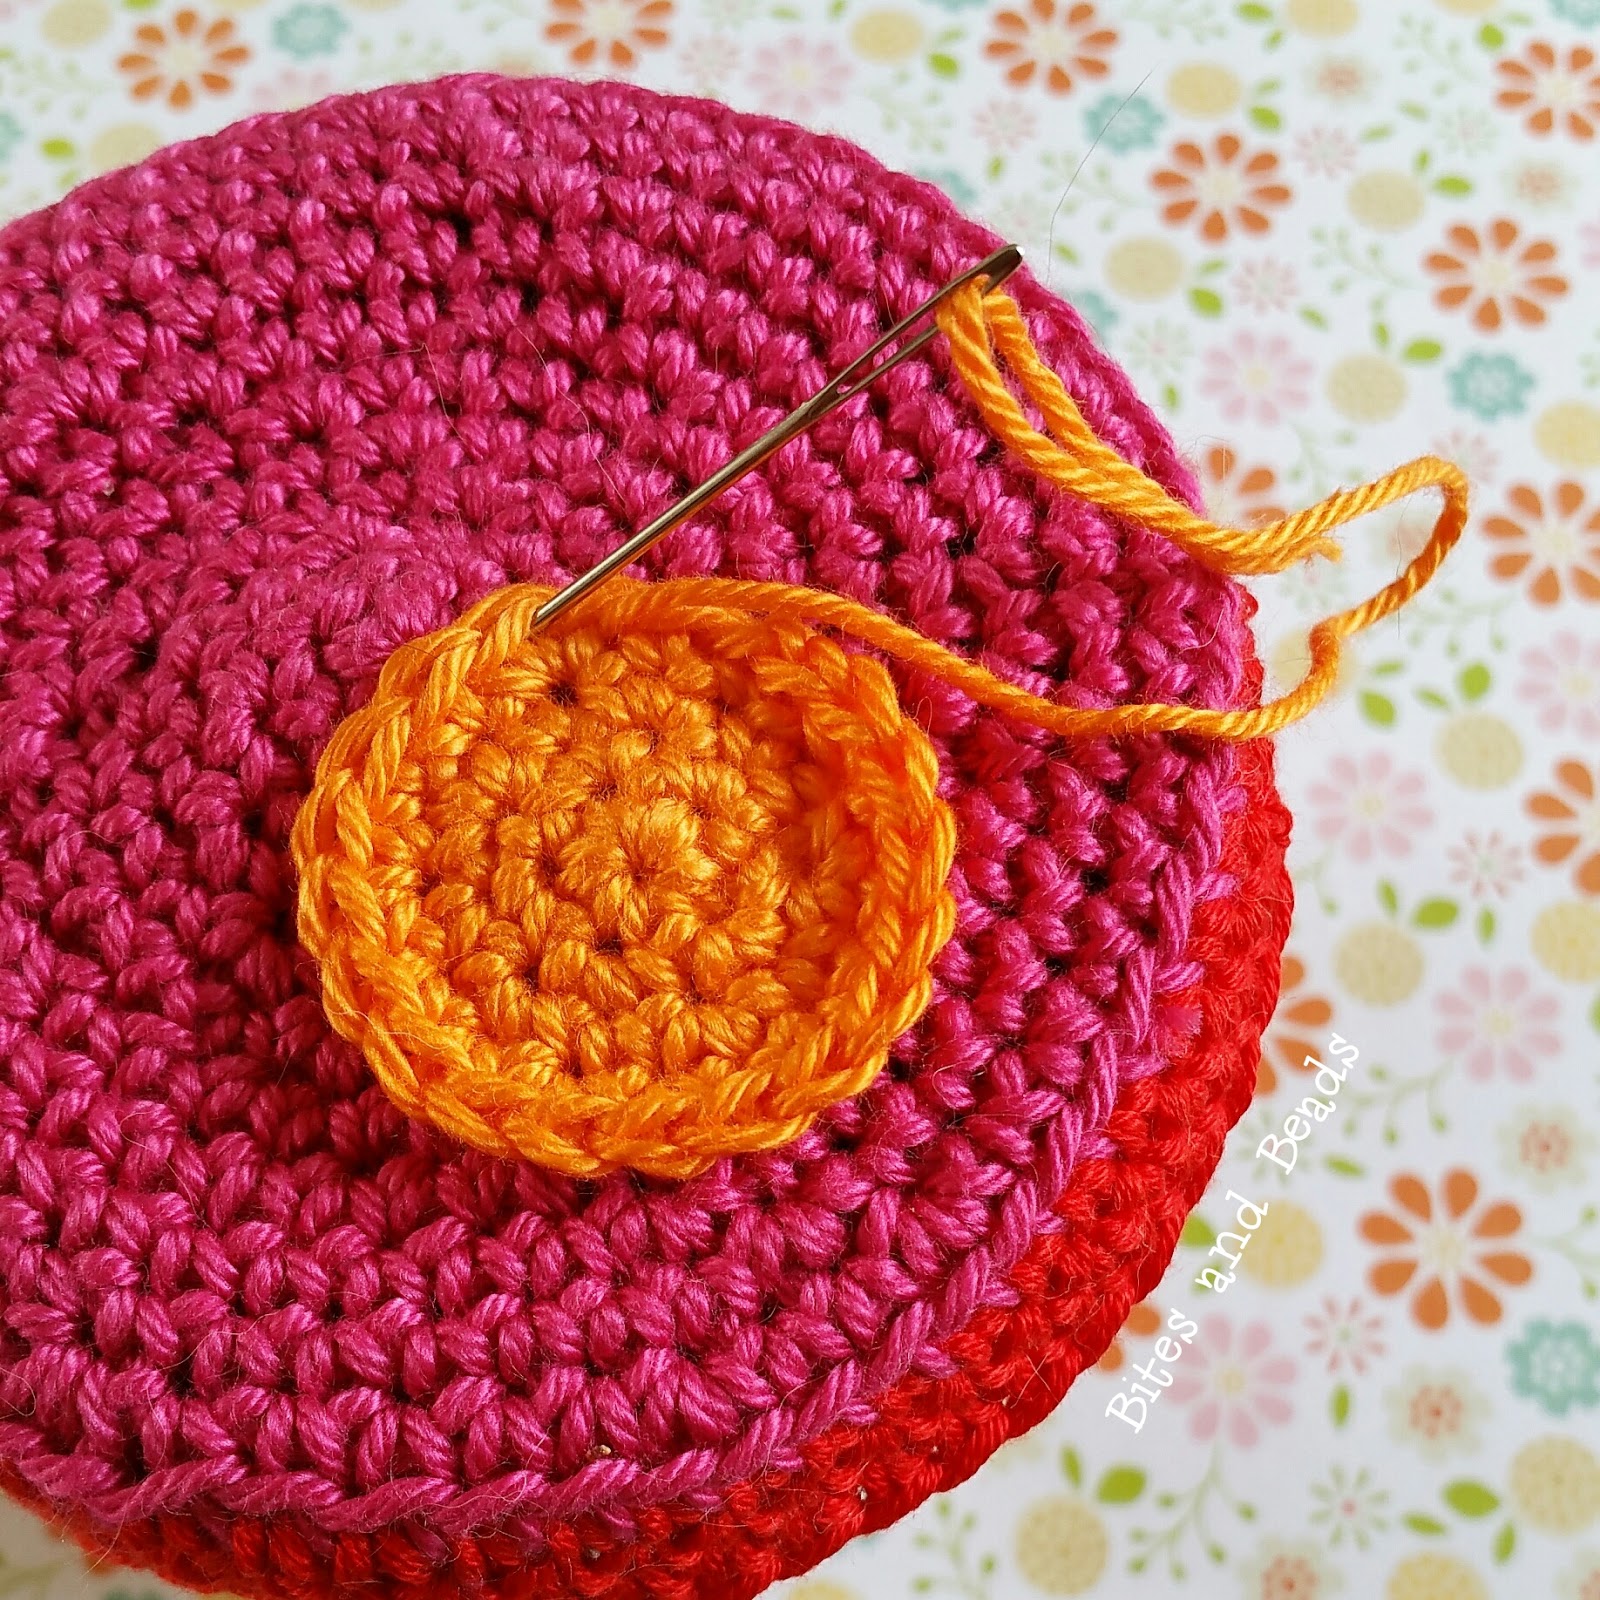
- Hecht een nieuwe kleur aan in een achterste lus, zoals je kunt zien op het plaatje hierboven, en een l.
- Attach a new colour in a backside loop, as you can see in the picture above, and ch 1.

- Haak vervolgens 1 v in elke achterste lus, en een hv in de l van de eerste steek van de toer.
- Crochet 1 sc in every backside loop, and a sl.st. in the ch of the first st.

- Haak de volgende 2 toeren 1 l en daarna 1 v in elke v, sluit af met een hv in de beginlosse. Je ziet het ietsje duidelijker op de foto hieronder. Als je niet begrijpt wat ik bedoel kun je me natuurlijk altijd een berichtje sturen!
- Werk de draadeindjes weg, ik gebruik hiervoor graag een scherpe naald, dan kun je de draden mooi onzichtbaar aan de achterkant wegwerken.
- The next two rounds you crochet 1 ch and then 1 sc in every st, close with a sl.st. in the starting chain. It's a bit easier to see in the picture underneath. If you don't understand my instructions, you can always send me a message!
- Work in all ends, I prefer using a sharp needle, so I can hide the ends neatly in the backside of my work.

Voor de peer en de sinaasappel begin je precies hetzelfde als bij het hoesje.
Ik eindigde bij een toer van 20 voor een peer voor een klein dekseltje, en bij 25 voor de grotere deksel. En ook bij 25 voor de sinaasappel natuurlijk.
Hier is het vervolg voor de bovenkant van de peer:
- Haak 1 v in de vlgd st, 1 v, 1 v, 1 hv, keer je werk.
- Haak 1 v, 1 v, keer je werk.
- Haak 1 v in de 2e st vanaf de naald.
- Hecht af en het is handig als je de draad afknipt op ongeveer 20 cm,
hiermee kun je de peer op het hoesje vastnaaien.
For making the pear and the orange you start exactly the same as for the cover. I ended up with a round of 20 stitches for a pear for a small lid, and 25 for the larger lid. And also 25 stitches for the orange obviously.
This is the next part for the pear:
- 1 sc in the next stitch, 1 sc, 1 sc, 1 sl.st and turn your work.
- 1 sc, 1 sc, turn your work.
- 1 sc in the second st from your hook.
Cast off, and cut the thread, leave an end of approximately 20 cm, so you can use this to attach the pear to the cover.

Voor de sinaasappel doe je dus hetzelfde, maar dit draadje hoeft niet zo lang te zijn, aangezien je de partjes er nog met wit op gaat borduren.
You do the same for the orange, but the end doesn't need to be as long, since you're going to embroider the parts on it with white.
Ik begon met de onderkant van de peertjes, zodat ik daarna de bovenkant een beetje kon vormen zoals een peer. Die is natuurlijk bijna nooit recht, zeker niet als ze uit je eigen tuin komen.
De sinaasappelpartjes borduurde ik supersimpel met een rijgsteek, de ruimtes ertussen vulde ik op in de volgende ronde.
En de peren kregen natuurlijk een bruin steeltje (dubbel geborduurd)...
I started with the bottom of the pears, so after that I could shape the upper part like a pear, which is hardly ever straigth, especially when it's from your own garden.
I embroidered the parts of the orange with a simple running stitch, I filled up the open spaces in between in the second round. And of course the pears got a brown stem, with one running stitch, but double embroidered.

Als je net als ik de smaak te pakken hebt en nog veel meer jam wilt maken, ik verzon vorig jaar twee recepten voor druivengelei, ook verschrikkelijk lekker...!
http://bitesandbeads.blogspot.nl/2016/09/twee-heerlijke-recepten-voor.html
Ik zou het enorm leuk vinden om van je te horen als je de jam maakt, of de hoesjes!
Je kunt natuurlijk hieronder een berichtje achterlaten, of op mijn Instagram-account:
It matches this poster perfectly don't you think? It's an enlargement of a picture from the Mexican Lottery, la Loteria.
If you got the taste for jam making now just like me, and you're looking for more delicious recipes: here's the link to my two original recipes for grape jelly:
http://bitesandbeads.blogspot.nl/2016/09/twee-heerlijke-recepten-voor.html
If you got the taste for jam making now just like me, and you're looking for more delicious recipes: here's the link to my two original recipes for grape jelly:
http://bitesandbeads.blogspot.nl/2016/09/twee-heerlijke-recepten-voor.html
I would really like to hear from you when you make the jam or the covers!
You can leave a message underneath, or on my Instagram account:
Fijne dag! Have a great day!
x Maartje

I love your pattern, thank you so much for sharing!
BeantwoordenVerwijderenX Sharon
Echt zo leuk!! Dank je wel, groetjes Miriam
BeantwoordenVerwijderen